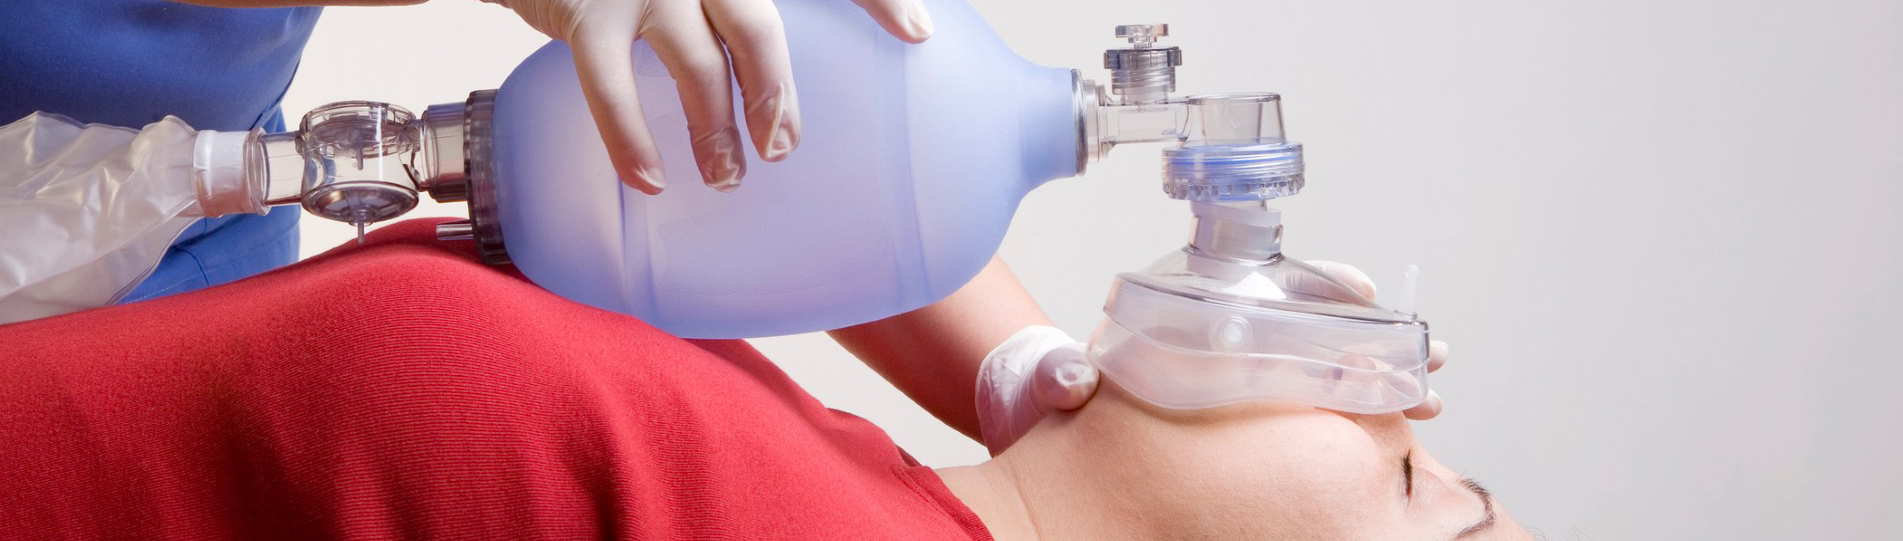

Un paro cardíaco se produce sin previo aviso. Tu respuesta en los primeros minutos determina la supervivencia. Una mascarilla de bolsillo convierte la respiración artificial en un acto seguro e higiénico. Crea una barrera entre tú y la víctima mientras suministra oxígeno vital.
La supervivencia general hasta el alta hospitalaria de los pacientes cuyo evento no fue presenciado por los servicios de emergencia fue del 8,5 %. De estos, los pacientes que recibieron RCP por parte de un transeúnte tuvieron una tasa de supervivencia general más alta (11,2 %) que aquellos que no la recibieron (7,0 %).
La técnica adecuada requiere tres elementos: posicionamiento, sellado y ventilación. Esta guía cubre escenarios para un solo reanimador y para dos reanimadores, además de ajustes para niños. Con la práctica, podrá dominar el uso de la mascarilla de RCP de bolsillo con confianza.mascarilla de bolsillo para RCPPodría salvar una vida. Cada mascarilla de bolsillo que llevas contigo representa preparación.
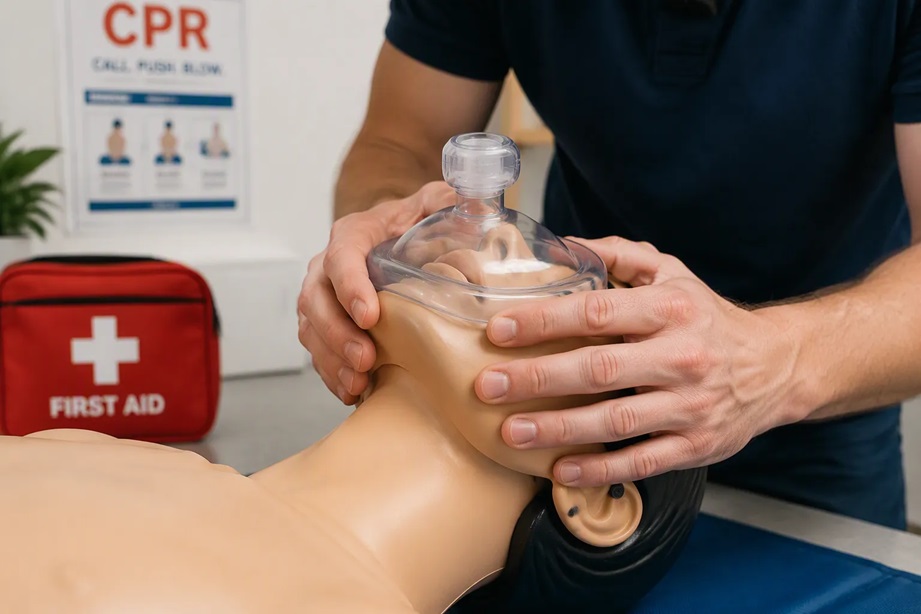
Una mascarilla de bolsillo es un dispositivo compacto que puede salvar vidas. Quizás te preguntes: ¿qué es exactamente una mascarilla de RCP de bolsillo? Consiste en una pieza facial flexible hecha de silicona resistente o plástico de alta densidad. En el centro, una válvula unidireccional se conecta a un puerto de ventilación. Este diseño sencillo permite realizar respiraciones de rescate de forma segura y eficaz. Cada mascarilla de bolsillo que llevas contigo representa estar preparado para una emergencia.
La válvula unidireccional es el componente más crítico de cualquier mascarilla de RCP de bolsillo. Cumple dos funciones esenciales:
Esta barrera reduce significativamente el riesgo de contaminación cruzada durante las respiraciones de rescate. Sin esta válvula, se estaría expuesto directamente al aire exhalado por la víctima y a posibles patógenos.
La transparencia es otra característica vital. Una máscara transparente permite ver la boca y la nariz de la víctima. Se puede observar la elevación del pecho y comprobar si hay obstrucciones sin romper el sellado. Muchos modelos incluyen un puerto de entrada de oxígeno. Este puerto permite conectar una manguera de oxígeno para una mayor concentración. La siguiente tabla muestra las diferencias:
|
Característica |
Sin O2Entrada |
Con entrada de O2 |
|---|---|---|
|
Conexión de oxígeno |
No se puede conectar ninguna manguera. |
La manguera se conecta a través de la entrada de O2. |
|
Suministro de oxígeno |
Solo el aire exhalado por el rescatador |
Mayor concentración de oxígeno suministrada al paciente |
El código de colores para elegir la mascarilla adecuada te ayuda a encontrarla rápidamente. El rosa indica la talla para bebés, el azul para niños y el transparente para adultos. Su estructura rígida facilita la correcta colocación de las manos durante las compresiones torácicas.
Tu rol determina qué características son más importantes. Ten en cuenta esta guía:
|
Tipo de usuario |
Características recomendadas |
Entorno de uso típico |
|---|---|---|
|
Técnicos de emergencias médicas, paramédicos, trabajadores de la salud |
Correa para la cabeza, puerto de oxígeno, máscaras para adultos/niños |
Ambulancias, hospitales, clínicas |
|
Civiles capacitados, entrenadores, personal de seguridad |
Compacto cmascarilla de talla única, opción de llavero |
Vehículos, lugares de trabajo, gimnasios |
|
instructores de RCP, formadores corporativos |
Múltiples máscaras, modelos de demostración, válvulas reemplazables. |
Instalaciones de formación, escuelas |
|
Equipos de emergencia, respuesta ante desastres |
Varias mascarillas, de diferentes tamaños, en envases a granel. |
Eventos con víctimas masivas, lugares públicos |
Los hospitales y los servicios de emergencias médicas deben evaluar la calidad del sellado de las mascarillas, sus características de control de infecciones, su compatibilidad con el equipo existente y el cumplimiento de la normativa. El valor del contrato a largo plazo, que incluye el apoyo en capacitación y los servicios de reposición, también es fundamental. Comparar el costo total de propiedad entre las empresas que fabrican mascarillas para RCP, en lugar de solo el precio unitario, ayuda a los compradores a equilibrar las limitaciones presupuestarias con el rendimiento clínico y la fiabilidad.
Amascarilla portátil para RCPDebe caber fácilmente en su botiquín de primeros auxilios o en la guantera. Tianzuo Medical ofrece una gama de mascarillas de bolsillo duraderas y de alta calidad, aptas tanto para uso profesional como personal. Sus productos incorporan las características esenciales mencionadas anteriormente. Al elegir su mascarilla de bolsillo, priorice la estanqueidad y la fiabilidad de la válvula. Una mascarilla bien elegida se convierte en una herramienta fiable en caso de emergencia.
Cuando respondes solo a un paro cardíaco, tu posición determina tu efectividad. Arrodíllate a la altura de la cabeza de la víctima, en lo que los rescatistas llaman la posición cefálica. Esta posición te sitúa directamente sobre el rostro, lo que te proporciona una visión clara tanto para colocar la mascarilla como para realizar las compresiones torácicas. Desde este punto de vista, puedes alternar entre compresiones y respiraciones sin mover el cuerpo. Además, mantienes una visión completa del tórax de la víctima para controlar su elevación con cada ventilación.
La posición de la máscara de bolsillo en el rostro de la víctima marca la diferencia entre un sellado efectivo y un intento fallido. Siga estos pasos para lograr la técnica adecuada:
Coloca el borde inferior de la mascarilla entre el labio inferior y la barbilla.
Coloca el lado puntiagudo de la mascarilla sobre la nariz.
Presione firmemente los bordes de la máscara sobre el rostro de la víctima para crear un cierre hermético.
Center the pocket mask over the victim's nose and mouth, ensuring that it covers both areas completely to prepare for a secure seal.
The mask's shape guides you naturally. The narrow end fits over the nasal bridge, while the wider portion covers the mouth. When you position the mask correctly, you do not need to pinch the victim's nose shut. The mask itself creates the seal around both openings. Use your thumbs to press down on the sides of the mask while your fingers lift the jaw upward. This maneuver opens the airway and maintains the seal simultaneously. Your grip should remain firm but controlled, avoiding excessive pressure that could distort the mask's shape.
With the mask sealed, you can begin rescue breathing. Tilt the victim's head back slightly to open the airway, then deliver each breath over one full second. Watch the chest rise with each breath you give. The chest should visibly lift, indicating that air enters the lungs. If the chest does not rise, reposition the mask and re-tilt the head before trying again.
The ventilation rate for adult CPR follows a specific rhythm:
This ratio means you perform 30 compressions, then pause briefly to deliver two breaths. The pause should last no longer than 10 seconds to minimize interruptions in blood flow. After each breath, allow the chest to fall completely before giving the next one. This passive exhalation prevents air trapping and prepares the lungs for the following breath.
Your cpr pocket mask serves as your primary tool for effective ventilation during solo resuscitation. The one-way valve ensures that the air you deliver reaches the victim without exposing you to their exhaled breath. This protection allows you to focus on the task rather than worrying about contamination.
Mastering these instructions transforms your portable CPR mask from a passive accessory into an active life-saving instrument. Practice the positioning and breath delivery until they become muscle memory. When you use pocket cpr mask techniques correctly, you provide the victim with the oxygen their brain and heart desperately need. Your airway control during these critical moments directly influences the outcome of the resuscitation effort. Each breath you deliver represents a deliberate, skilled action that keeps the victim alive until advanced help arrives.
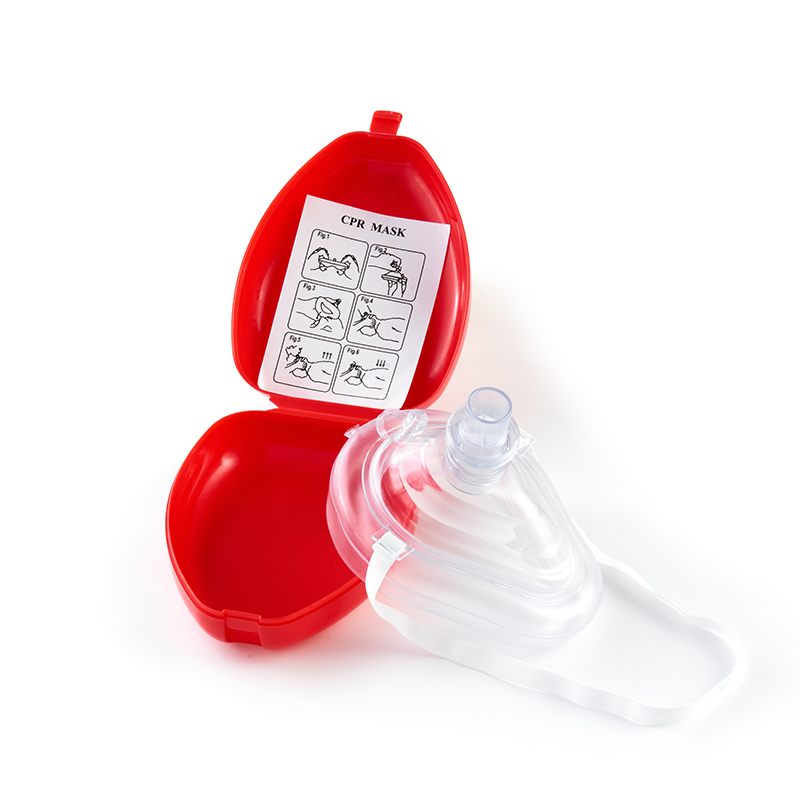
Two-rescuer CPR changes the dynamics of resuscitation. One person handles airway control while the other maintains blood flow through compressions. This division of labor reduces fatigue and improves the quality of both ventilations and chest compressions. The cpr pocket mask becomes the central tool for the rescuer managing the airway.
Rescuer 1 kneels beside the victim's chest and performs compressions. Rescuer 2 positions themselves at the victim's head, holding the pocket mask in place. This cephalic position gives you a direct line of sight to monitor chest rise with each breath.
Your role as the airway rescuer demands both hands on the mask. Place your thumbs along the sides of the mask and your fingers under the victim's jaw. Lift the jaw upward while pressing the mask firmly against the face. This dual action opens the airway and creates an airtight seal simultaneously. You do not need to pinch the nose because the mask covers both the nose and mouth completely.
The 2005 Emergency Cardiac Care guidelines for basic life support (BLS) recommend a compression to ventilation ratio of30:2for two-rescuer CPR. Although the source specifically mentions a bag-valve mask, the same ratio applies when using a pocket mask, as the ratio is device-independent and based on minimizing no-flow time.
Maintain your grip throughout the entire resuscitation. A loose seal allows air to escape, reducing the effectiveness of each breath. Your partner depends on your airway control to deliver oxygen efficiently.
The 30:2 ratio forms the backbone of your coordination. Rescuer 1 delivers 30 compressions at a rate of 100–120 per minute, with a depth of 2–2.4 inches and full chest recoil. After the 30th compression, Rescuer 1 pauses briefly. You then deliver two rescue breaths, each lasting one second, watching for visible chest rise.
Timing matters more than you might expect. Research shows that using a pocket mask significantly reduces the time needed for each ventilation compared to mouth-to-mouth. The table below illustrates this difference:
|
Metric |
Pocket Mask |
Mouth-to-Mouth |
|---|---|---|
|
Time per ventilation cycle |
0.923 sec (±0.432) |
1.021 sec (±0.535) |
|
Delay before restarting compressions |
9.88 sec (±2.831) |
10.21 sec (±4.112) |
The pause between the last breath and the resumption of compressions must stay under 10 seconds. Studies indicate that the group performing mouth-to-mouth ventilation exhibited longer interruptions in chest compressions compared to the group using a pocket mask. This finding aligns with the American Heart Association guidelines, which recommend not exceeding 10 seconds between completing two rescue breaths and initiating chest compressions. Your pocket mask helps you stay within this timeframe, optimizing the compression cycle.
Follow this sequence for smooth coordination:
Rescuer 1 performs 30 compressions, counting aloud to maintain rhythm.
Rescuer 1 pauses after the 30th compression.
You deliver 2 breaths through the mask, each lasting 1 second with visible chest rise.
Rescuer 1 resumes compressions immediately after the second breath.
Switch roles every 2 minutes or sooner if fatigue sets in, completing the switch in less than 5 seconds.
Communication drives effective ventilation. Count compressions aloud. Announce switches clearly. Confirm when the AED arrives. These verbal cues keep both rescuers synchronized and prevent unnecessary interruptions.
The use pocket cpr mask technique in a two-rescuer scenario demands practice. You must develop muscle memory for the mask seal and breath delivery. Your partner must trust that you will deliver breaths efficiently during each pause. Together, you provide the victim with continuous, high-quality resuscitation.
These instructions transform your portable CPR mask into a coordinated life-saving tool. Master the rhythm, maintain the seal, and communicate clearly. Your combined efforts give the victim the best chance for survival.
Children and infants require different techniques than adults. Their anatomy differs significantly. A standard pocket mask may not fit properly. You must adapt your approach to ensure effective ventilation without causing injury.
The head-tilt maneuver varies by age. For adults, you tilt the head back fully using the head-tilt-chin-lift technique. This position opens the airway completely. For infants, the rules change. You must not extend the head past the "sniffing" position, which means only slightly tilted back from neutral. An infant's head is proportionally larger than an adult's. Over-extension can actually block the airway rather than open it.
Mask size matters just as much as head position. If you have a smaller mask available, use it. A pediatric or infant mask creates a better seal on a child's face. Without a smaller mask, adjust the standard mask's position. Place the wider portion over the mouth and the pointed end over the nose. Press gently to create a seal without applying excessive pressure. Your airway control during this step determines whether breaths reach the lungs effectively.
Breath delivery changes dramatically for younger patients. You give smaller breaths with less force. Watch the chest rise carefully. The moment you see the chest lift, stop the breath. Over-inflating a child's lungs can cause damage. The ventilation rate also increases compared to adults.
|
Age Group |
Ventilation Rate |
Breath Interval |
|---|---|---|
|
Infants (under 1 year) |
20-30 breaths per minute |
One breath every 2-3 seconds |
|
Children (older than 1 year) |
20-30 breaths per minute |
One breath every 2-3 seconds |
These rates apply regardless of the device you use. Your CPR pocket mask delivers breaths efficiently at this pace. The one-way valve prevents contamination while you maintain the rhythm. For infants, cover both the nose and mouth with the mask. For older children, the mask may fit over the mouth with the nose pinched gently.
Your portable CPR mask serves as a versatile tool across age groups. Practice with different mask sizes to build confidence. Each breath you deliver through the pocket mask provides essential oxygen. This rescue breathing technique keeps the child's brain and organs functioning until advanced help arrives. Master these adjustments now, and you will respond correctly when a child needs you.
Cleaning immediately after use prevents the spread of germs. A dirty mask cannot deliver safe rescue breaths. You must clean your cpr pocket mask thoroughly before storing it for the next emergency. The process requires attention to detail and proper technique.
Begin by preparing yourself. Wear an unused pair of latex or vinyl gloves before handling the used mask. This protects you from direct contact with bodily fluids.
Follow these steps to disassemble the mask for cleaning:
Gently pull and twist the cylinder-shaped nozzle from the center of the mask to detach it.
This separates the two parts of the mask, allowing each component to be fully sterilized before reuse.
With both pieces separated, wash them with mild soap and warm water. Use a soft cloth or sponge to remove any visible debris. Rinse thoroughly to remove all soap residue.
Disinfection kills remaining pathogens. The following disinfectants work effectively on pocket mask materials:
Apply your chosen disinfectant according to the product instructions. Allow the solution to remain on the mask surfaces for the recommended contact time. This ensures complete sterilization of both parts.
After disinfection, let the mask components air dry completely. Do not use a towel to dry them. Towel fibers can scratch the mask surface or leave lint behind. Place the pieces on a clean, dry surface in a well-ventilated area. Drying typically takes 30 to 60 minutes depending on humidity.
Inspect the one-way valve carefully once the mask is dry. Look for cracks, tears, or deformation. The valve must seal properly to prevent backflow of air and fluids. If you find any damage, replace the entire pocket mask. A compromised valve puts you at risk during rescue breathing.
Reassemble the mask by reconnecting the nozzle to the center of the facepiece. Confirm that the connection feels secure and the valve moves freely. Place the mask back into its protective case. Store the case in a cool, dry location away from direct sunlight. Extreme heat can degrade the materials over time.
These manual cleaning steps ensure your pocket mask remains ready for the next emergency. A well-maintained portable CPR mask performs reliably when you need it most. Make cleaning a habit after every use.
Mastering the use pocket cpr mask requires three essential actions: position the mask correctly, achieve an airtight seal, and deliver breaths that visibly lift the chest. These steps form the proper technique that transforms a simple device into a life-saving tool. Your cpr pocket mask becomes an extension of your training when you practice regularly.
Confidence grows through repetition. Handle your pocket mask often. Practice the seal on family members or mannequins. Familiarity with your portable CPR mask ensures you respond without hesitation when seconds matter.
Tianzuo Medicaloffers durable masks designed for repeated practice and real emergencies. Invest time in mastering this skill today. One trained person with a pocket mask can change the outcome of a cardiac arrest. Be that person.
You should inspect your CPR pocket mask after every use. Check the one-way valve for cracks or tears. Replace the mask immediately if you notice any damage. Most manufacturers recommend replacing the mask every two to three years, even with proper care. Store it in a cool, dry place to extend its lifespan.
Yes, you can use a pocket mask on a person with facial hair. The seal may not be perfect, but you can improve it by applying firm pressure. Wet the beard area slightly if possible. This helps create a better seal. Continue rescue breaths even if you see some air leakage around the edges.
Aunque no disponga de una mascarilla de bolsillo, realice la RCP. Si tiene a mano una careta protectora, utilice un protector facial. De lo contrario, realice la RCP solo con compresiones torácicas continuas. Este método permite la oxigenación mediante la expansión pasiva del tórax. Llame inmediatamente a los servicios de emergencia y siga sus instrucciones hasta que llegue la ayuda.
La formación formal te ayuda a dominar la técnica correcta, pero puedes usar el dispositivo sin certificación. El diseño de la máscara te guía de forma natural. Lee las instrucciones que vienen con tu máscara de RCP portátil. Practica en un maniquí o almohada para ganar confianza. En una emergencia, tu disposición a actuar es más importante que la técnica perfecta.

 Compatible con red IPv6


 español
 English
 فارسی
فارسی français
 Deutsch
 русский
 italiano
 português
 العربية
 Türkçe